先决条件:
这里服务器的系统是:
Ubuntu 18.04
Nginx安装
先更新软件包列表,再安装
Nginx1
2sudo apt-get update
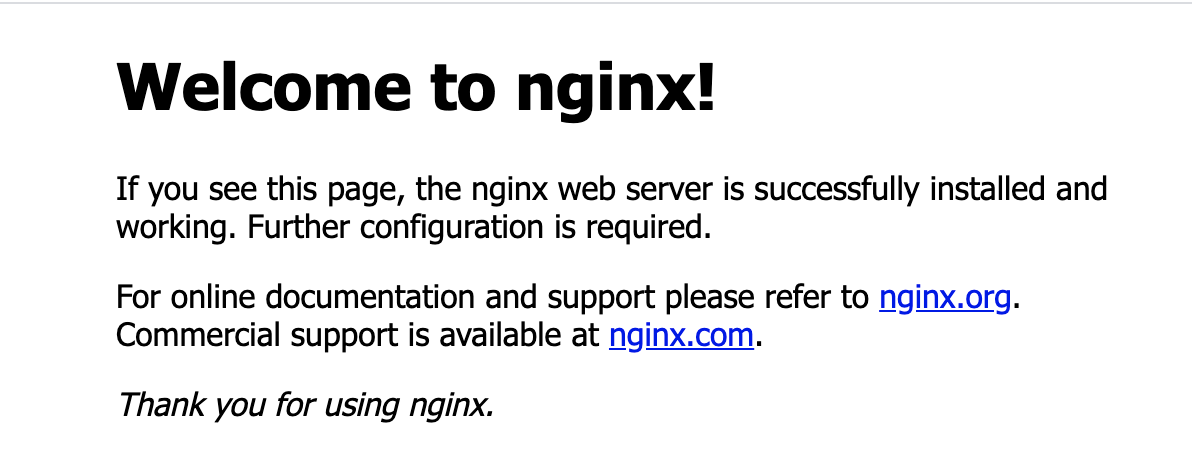
sudo apt-get install nginx安装完成后,打开浏览器,输入服务器 http://server_domain_or_ip 地址,如下图所示,则说明安装成功
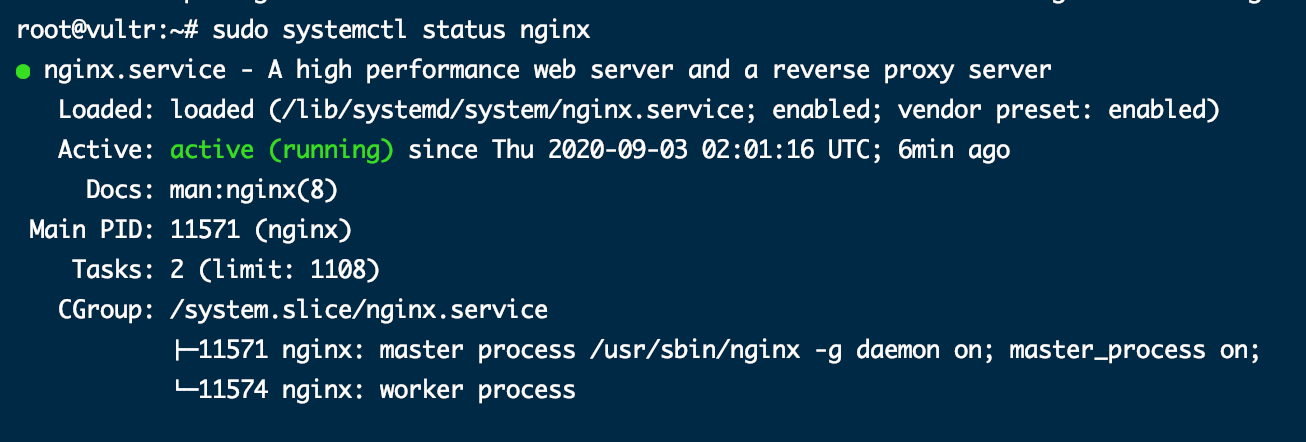
也可以通过检查服务状态(安装完成后,
Nginx服务自动启动),如下图所示,则说明安装成功1
sudo systemctl status nginx
配置Nginx
建议: 一般情况下,将要托管在服务器上的每个
域的/var/www目录中创建一个单独的目录,用于存储对应网站的文件。
常见管理 Nginx 服务命令
1 | sudo nginx -t # 检查 Nginx 配置是否正确 |
配置 Hexo 域服务
以下
blog.shenyuanluo.com替换成你自己的域名。(使用域名是为了方便标识管理,也可以使用其他任意合法文件夹名称)
创建
Hexo域根目录,并修改权限1
2
3sudo mkdir -p /var/www/blog.shenyuanluo.com
sudo chown -R www-data /var/www/blog.shenyuanluo.com
sudo chmod -R 755 /var/www/blog.shenyuanluo.comwww-data是 Nginx 的用户,可以通过/etc/nginx/nginx.conf查看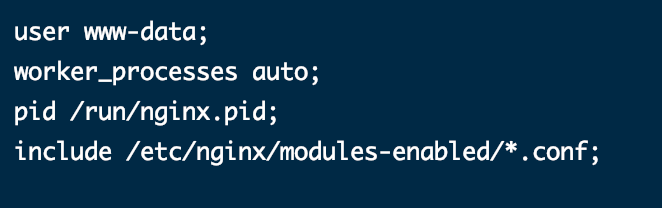
创建
index.html文件(用于测试该域网站的服务是否配置成功,后续需自行删除)1
sudo vim /var/www/blog.shenyuanluo.com/index.html
文件输入以下内容:
1
2
3
4
5
6
7
8
9
10
<html lang="en" dir="ltr">
<head>
<meta charset="utf-8">
<title>blog.shenyuanluo.com</title>
</head>
<body>
<h1>Success! Welcome to blog.shenyuanluo.com home page!</h1>
</body>
</html>创建该域服务块配置文件
Ubuntu 系统上,Nginx 域服务块配置文件存储在
/etc/nginx/sites-available目录下,该文件通过指向/etc/nginx/sites-enabled/目录的符号链接启用1
sudo vim /etc/nginx/sites-available/blog.shenyuanluo.com
文件输入以下内容:
1
2
3
4
5
6
7
8
9
10
11
12
13
14
15
16
17server {
listen 80;
listen [::]:80;
root /var/www/blog.shenyuanluo.com; # 根目录(对应域的网站根目录)
index index.html;
server_name blog.shenyuanluo.com www.blog.shenyuanluo.com; # 域名
access_log /var/log/nginx/blog.shenyuanluo.com.access.log; # 访问日志
error_log /var/log/nginx/blog.shenyuanluo.com.error.log; # 错误日志
location / {
try_files $uri $uri/ =404;
}
}创建配置文件符号连接
要启用新建的域服务块配置文件,需创建一个从文件到
sites-enabled目录的符号链接,该链接在启动时由 Nginx 读取。1
sudo ln -s /etc/nginx/sites-available/blog.shenyuanluo.com /etc/nginx/sites-enabled/
测试配置,如图所示则说明配置成功
1
sudo nginx -t

重启 Nginx 服务,使服务生效
1
sudo systemctl restart nginx
打开浏览器,输入服务器 http://blog.shenyuanluo.com 地址,如下图所示(刚刚创建的网页文件内容),则说明安装成功

配置 Chevereto 域服务
基本与配置
Hexo域相同。
创建
Chevereto域根目录,并修改根目录权限1
2
3sudo mkdir -p /var/www/images.shenyuanluo.com
sudo chown -R www-data /var/www/images.shenyuanluo.com
sudo chmod -R 755 /var/www/images.shenyuanluo.com创建
index.html文件(用于测试该域网站的服务是否配置成功,后续需自行删除)1
sudo vim /var/www/images.shenyuanluo.com/index.html
文件输入以下内容:
1
2
3
4
5
6
7
8
9
10
<html lang="en" dir="ltr">
<head>
<meta charset="utf-8">
<title>images.shenyuanluo.com</title>
</head>
<body>
<h1>Success! Welcome to images.shenyuanluo.com home page!</h1>
</body>
</html>创建该域服务块配置文件
1
sudo vim /etc/nginx/sites-available/images.shenyuanluo.com
文件输入以下内容:
1
2
3
4
5
6
7
8
9
10
11
12
13
14
15
16
17server {
listen 80;
listen [::]:80;
root /var/www/images.shenyuanluo.com; # 根目录(对应域的网站根目录)
index index.html;
server_name images.shenyuanluo.com www.images.shenyuanluo.com; # 域名
access_log /var/log/nginx/images.shenyuanluo.com.access.log; # 访问日志
error_log /var/log/nginx/images.shenyuanluo.com.error.log; # 错误日志
location / {
try_files $uri $uri/ =404;
}
}创建配置文件符号连接
1
sudo ln -s /etc/nginx/sites-available/images.shenyuanluo.com /etc/nginx/sites-enabled/
测试配置,如图所示则说明配置成功
1
sudo nginx -t
重启 Nginx 服务,使服务生效
1
sudo systemctl restart nginx
打开浏览器,输入服务器 http://blog.shenyuanluo.com 地址,如下图所示(刚刚创建的网页文件内容),则说明安装成功

配置 Let’s Encrypted(即 https 访问)
注意:这里
your_domain_addr和www.your_domain_addr需提前解析指向服务器的IP地址。
配置 blog.shenyuanluo.com
安装 certbot 客户端
1
2sudo apt-get update
sudo apt-get install certbot获取证书
-w: 是对应 域 服务的根目录
-d: 是对应的域名访问地址
1
sudo certbot certonly --webroot -w /var/www/blog.shenyuanluo.com/ -d blog.shenyuanluo.com -d www.blog.shenyuanluo.com
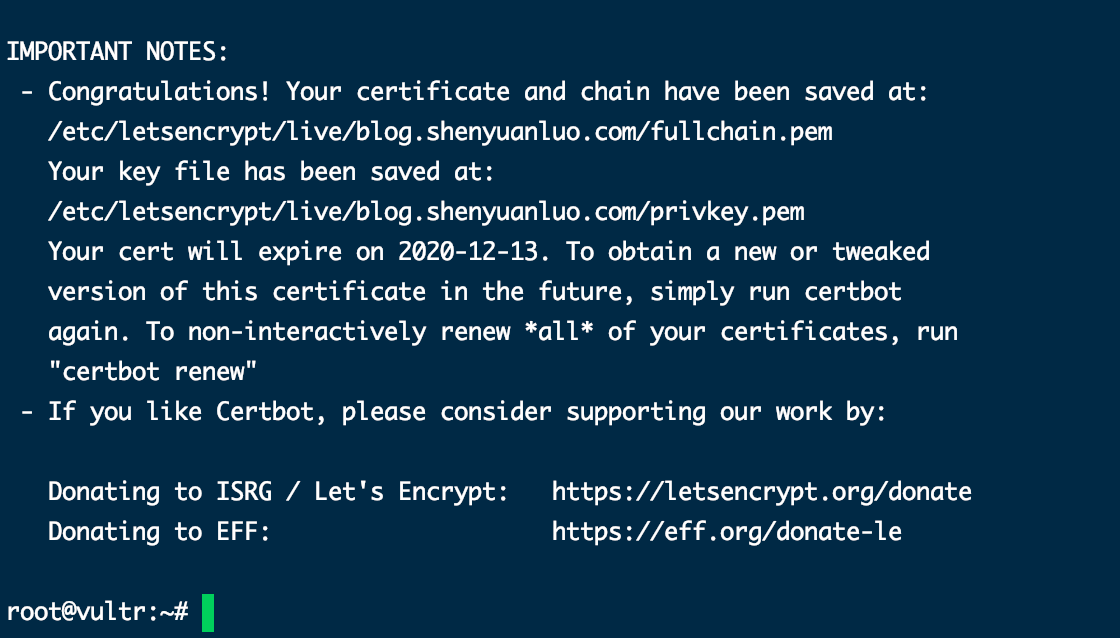
输入邮箱地址(用于接收:紧急更新和安全通知),并同意安装即可

获取成功如下所示
编辑域服务块配置文件
1
sudo vim /etc/nginx/sites-available/blog.shenyuanluo.com
修改为如下内容:
1
2
3
4
5
6
7
8
9
10
11
12
13
14
15
16
17
18
19
20
21
22
23
24server {
listen 443 ssl; # https 监听
server_name blog.shenyuanluo.com www.blog.shenyuanluo.com; # 域名地址
index index.html index.htm index.php;
root /var/www/blog.shenyuanluo.com; # 根目录(对应域的网站根目录)
location ^~ /.well-known/acme-challenge/ {
default_type "text/plain";
root /var/www/blog.shenyuanluo.com/; # 根目录
}
location = /.well-known/acme-challenge/ {
return 404;
}
ssl_certificate /etc/letsencrypt/live/blog.shenyuanluo.com/fullchain.pem; # 证书位置
ssl_certificate_key /etc/letsencrypt/live/blog.shenyuanluo.com/privkey.pem; # 证书-私钥位置
}
server {
listen 80; # http 监听
server_name blog.shenyuanluo.com www.blog.shenyuanluo.com; # 域名地址
return 301 https://$server_name$request_uri; # 重定向至 https
}
配置 images.shenyuanluo.com
获取证书
1
sudo certbot certonly --webroot -w /var/www/images.shenyuanluo.com/ -d images.shenyuanluo.com -d www.images.shenyuanluo.com
编辑域服务块配置文件
1
sudo vim /etc/nginx/sites-available/images.shenyuanluo.com
修改为如下内容:
1
2
3
4
5
6
7
8
9
10
11
12
13
14
15
16
17
18
19
20
21
22
23
24server {
listen 443 ssl; # https 监听
server_name images.shenyuanluo.com www.images.shenyuanluo.com; # 域名地址
index index.html index.htm index.php;
root /var/www/images.shenyuanluo.com; # 根目录(对应域的网站根目录)
location ^~ /.well-known/acme-challenge/ {
default_type "text/plain";
root /var/www/images.shenyuanluo.com/; # 根目录
}
location = /.well-known/acme-challenge/ {
return 404;
}
ssl_certificate /etc/letsencrypt/live/images.shenyuanluo.com/fullchain.pem; # 证书位置
ssl_certificate_key /etc/letsencrypt/live/images.shenyuanluo.com/privkey.pem; # 证书-私钥位置
}
server {
listen 80; # http 监听
server_name images.shenyuanluo.com www.images.shenyuanluo.com; # 域名地址
return 301 https://$server_name$request_uri; # 重定向至 https
}
重启 Nginx 服务,使服务生效
1 | sudo systemctl restart nginx |
至此,再打开浏览器访问
http://blog.shenyuanluo.com、http://images.shenyuanluo.com即可实现定向至https。
搭建 Hexo
服务端配置
创建 Git 仓库(在
/var/repo/下创建名为hexoblog的裸仓库1
2
3
4
5
6sudo mkdir /var/repo
sudo chown -R $USER:$USER /var/repo
sudo chmod -R 755 /var/repo
cd /var/repo
git init --bare hexoblog.git创建
Git钩子,在自动生成的hooks目录下创建一个新的钩子文件:post-receive1
sudo vim /var/repo/hexoblog.git/hooks/post-receive
添加如下内容:
1
2
3!/bin/bash
git --work-tree=/var/www/blog.shenyuanluo.com --git-dir=/var/repo/hexoblog.git checkout -f①、
--work-tree: 是对应的域服务根目录②、
--git-dir:是对应的 Git 仓库目录修改钩子文件为 可执行文件
1
sudo chmod +x /var/repo/hexoblog.git/hooks/post-receive
本地配置
前提是本地已经搭建了Hexo博客并且成功运行,就不再赘述。如果还不清楚怎么搭建了,可以参考 Mac平台下使用Hexo+Github搭建博客流程 中 配置 Hexo 部分内容。
把仓库从服务器上克隆下来(以此来将服务器地址添加到受信任的站点中)
1
2cd ~/Desktop/your_github_space
sudo git clone root@your_server_ip:/var/repo/hexoblog.git编辑 站点 配置文件
comfig.yml,作如下修改1
2
3
4
5
6
7
8
9
10
11
12# URL
## If your site is put in a subdirectory, set url as 'http://yoursite.com/child' and root as '/child/'
url: http://server-ip # 没有绑定域名时填写服务器的实际 IP 地址。
root: /
permalink: :year/:month/:day/:title/
permalink_defaults:
deploy:
type: git # 使用 Git 发布
repo: root@your_server_ip:/var/repo/hexoblog.git # 个人服务器
branch: master # 主干分支安装 Hexo 部署到 Git 仓库的插件
1
npm install hexo-deployer-git --save
发布到个人服务器
1
hexo c && hexo g && hexo d
至此,Hexo 博客已经搭建成功,访问 http://blog.shenyuanluo.com 即可成功访问博客。
搭建 Chevereto
安装 MySQL
更新安装包,并安装
MySQL1
2sudo apt-get update
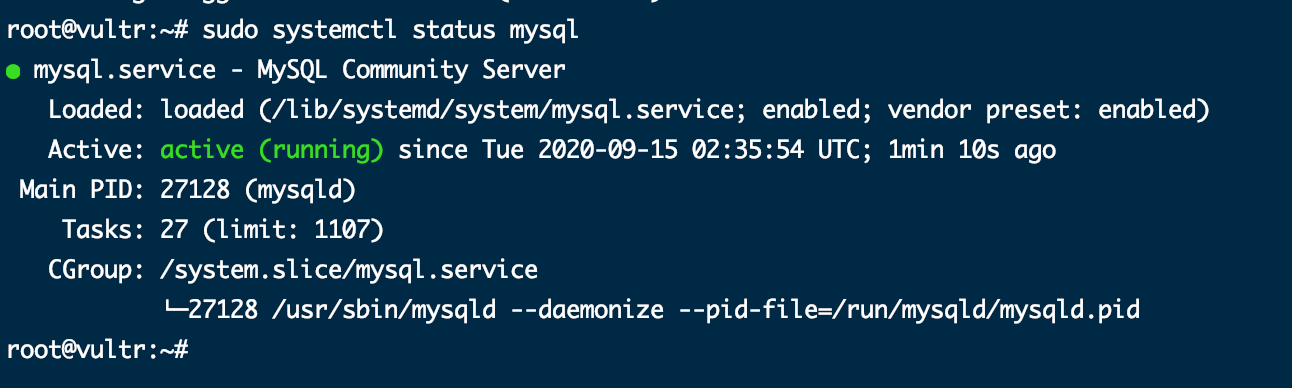
sudo apt-get install mysql-server安装完成后,
MySQL服务将自动启动。检查器运行状态1
sudo systemctl status mysql
安装保护
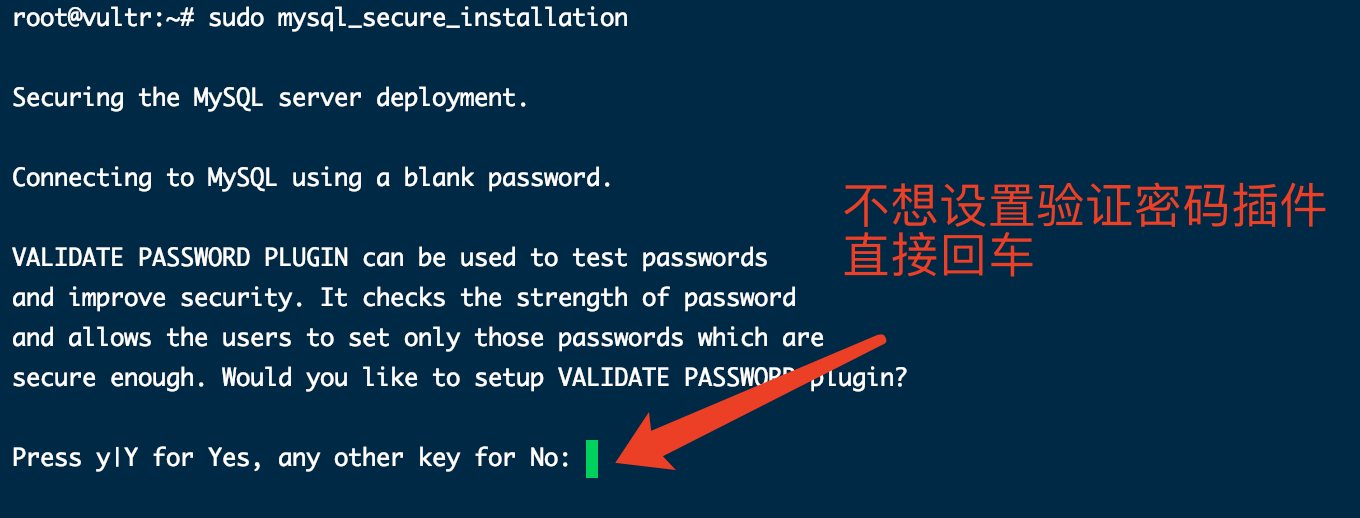
MySQL脚本该工具用于测试
MySQL用户密码的强度并提高安全性;密码验证策略分为三个级别:低,中和强。如果您不想设置验证密码插件,请按ENTER忽略。1
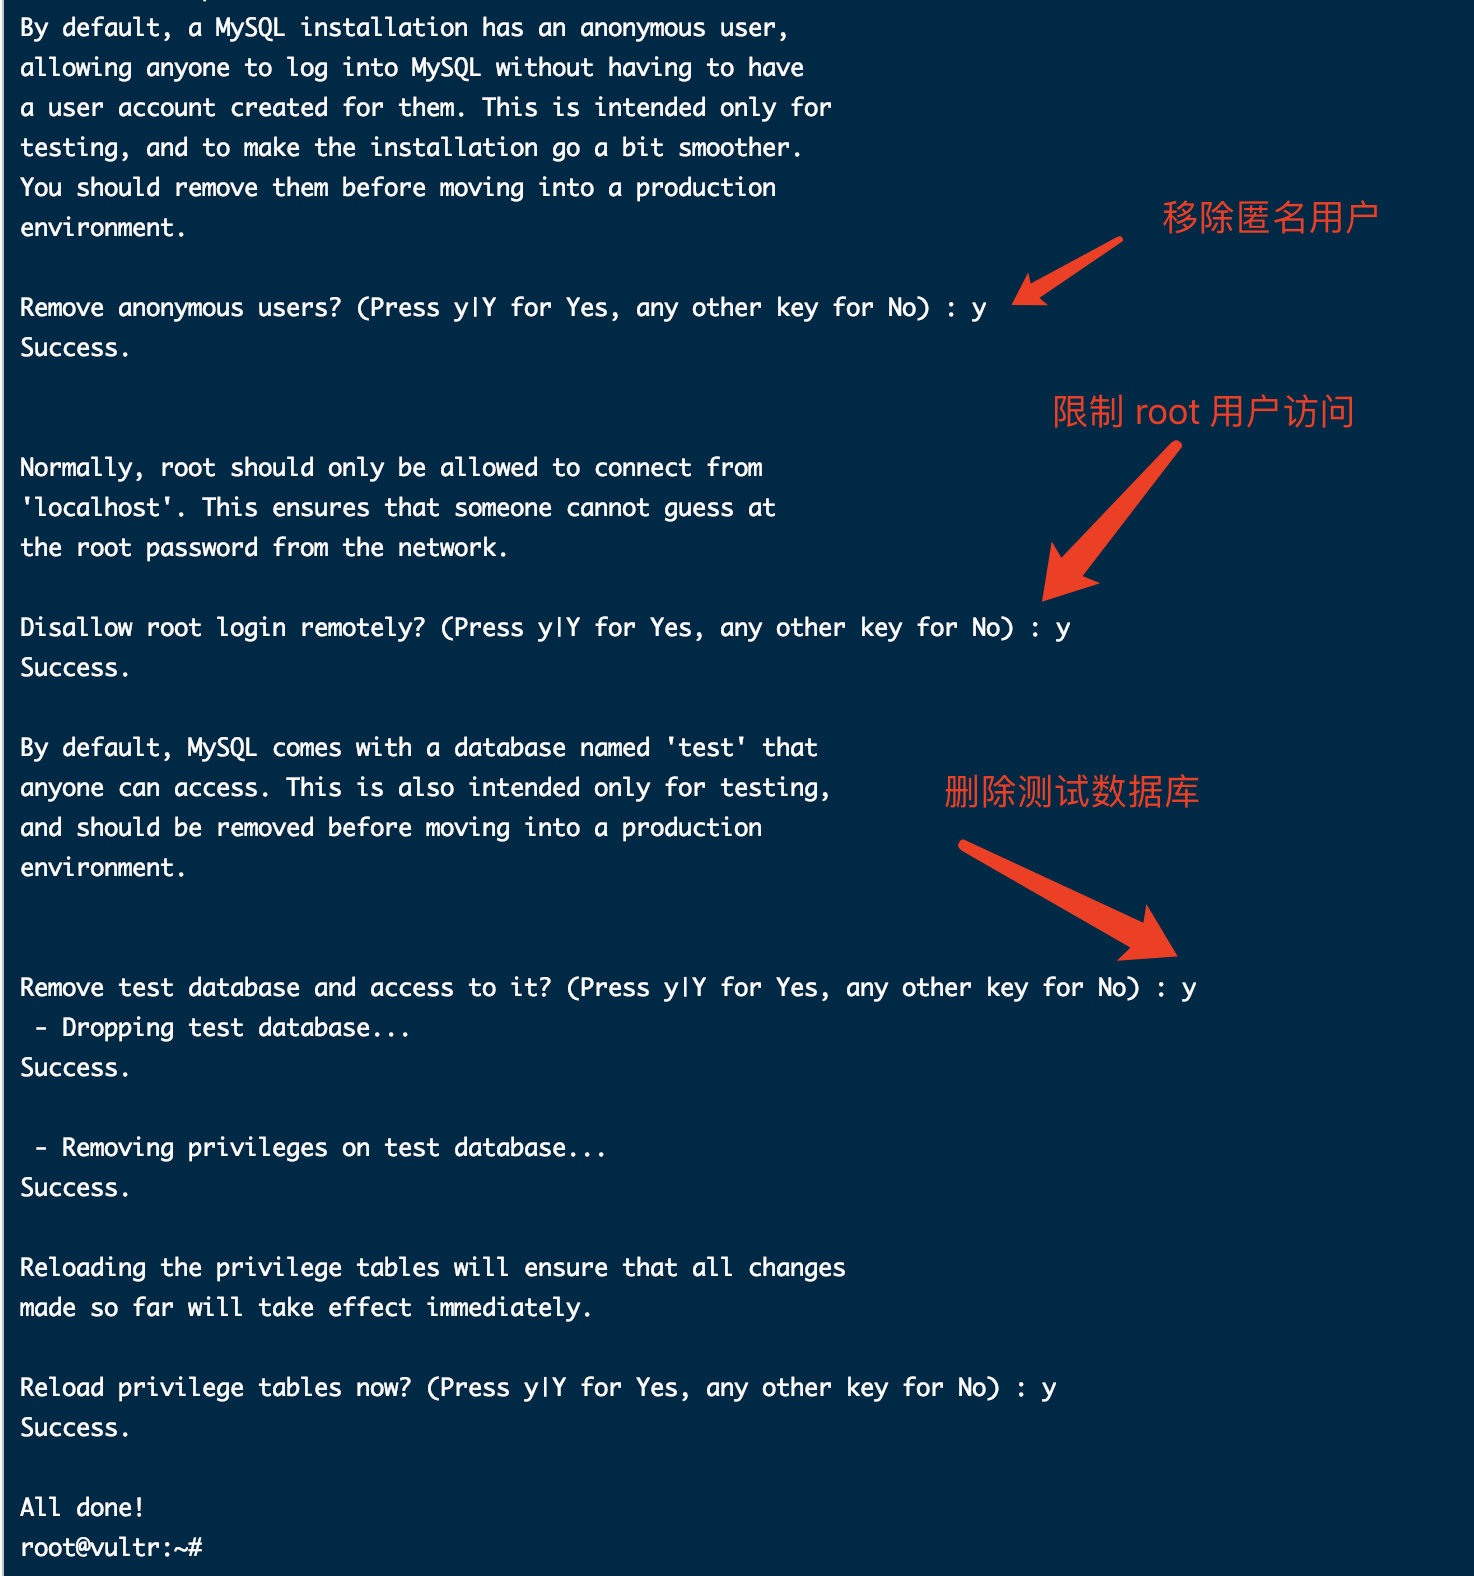
sudo mysql_secure_installation
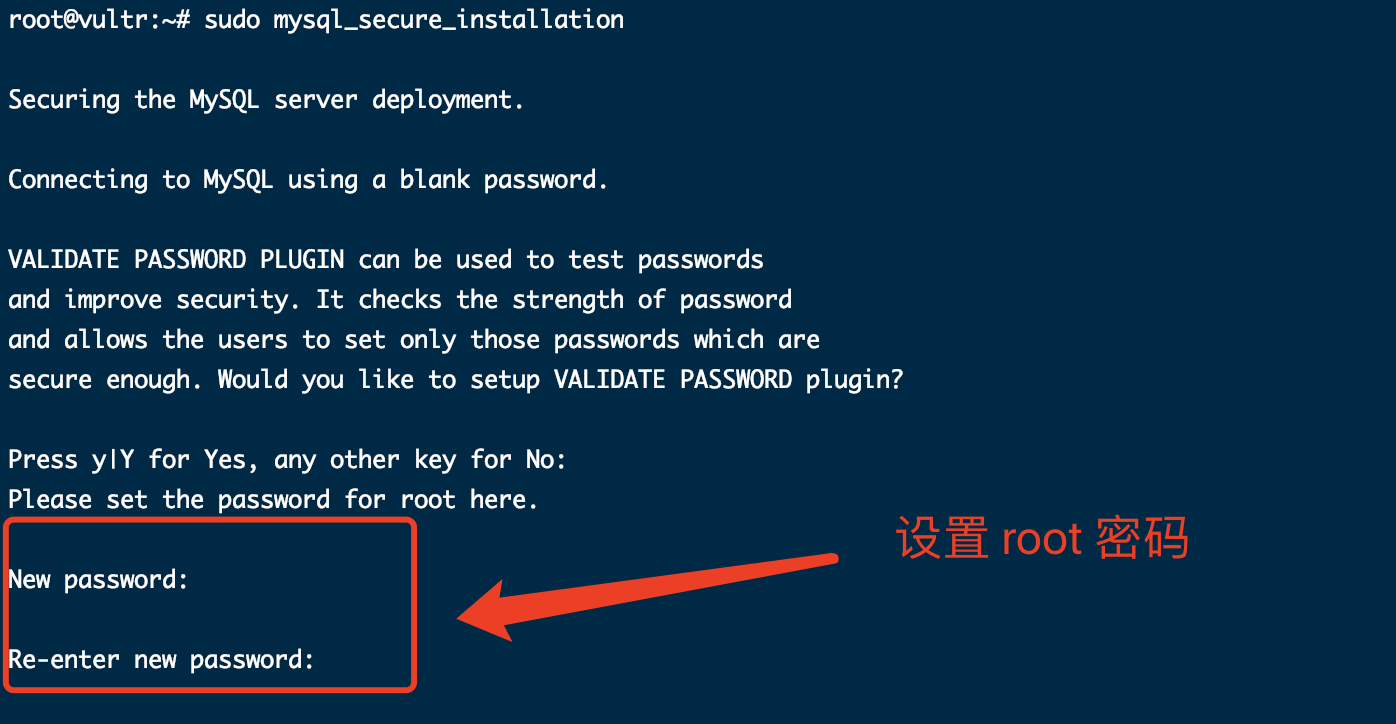
忽略设置验证密码插件
接着设置 MySQL root 用户密码(请记住这个密码)
删除匿名用户,限制root用户对本地计算机的访问并删除测试数据库
以
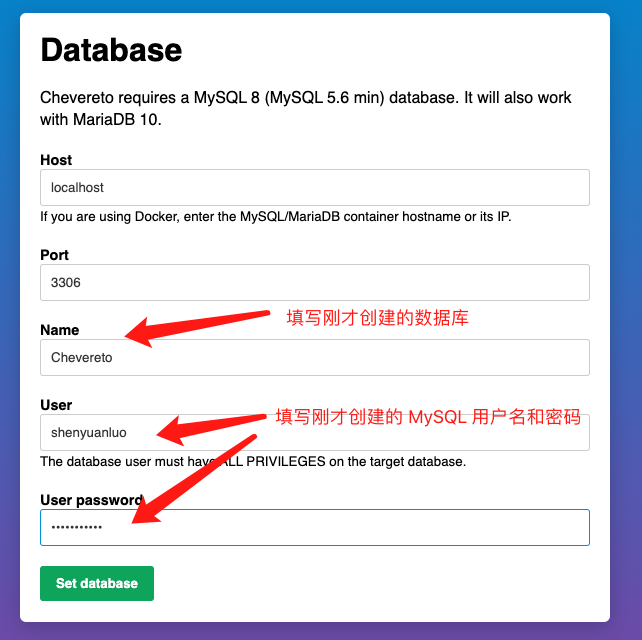
root用户身份登录 MySQL,并创建一个可以访问所有数据库的新管理用户(记住这个用户),并创建一个新的数据库(记住这个数据,待会用于设置 chevereto)1
2
3
4sudo mysql
GRANT ALL PRIVILEGES ON *.* TO 'new_admin_user_name'@'localhost' IDENTIFIED BY 'new_admin_password'; # 注意,这里是 SQL 语句,必须以分号结束
CREATE DATABASE IF NOT EXISTS Chevereto; # 创建数据库
exit # 退出 MySQL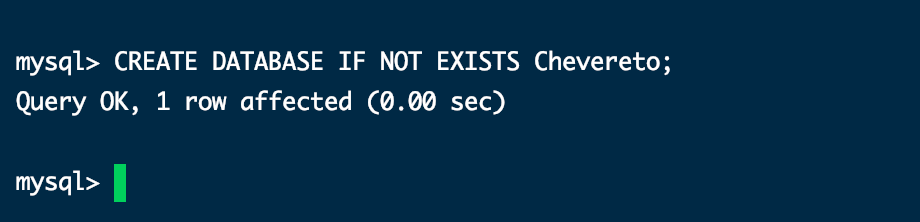
安装 PHP
更新安装包,并安装
MySQL1
2sudo apt-get update
sudo apt-get install php-fpm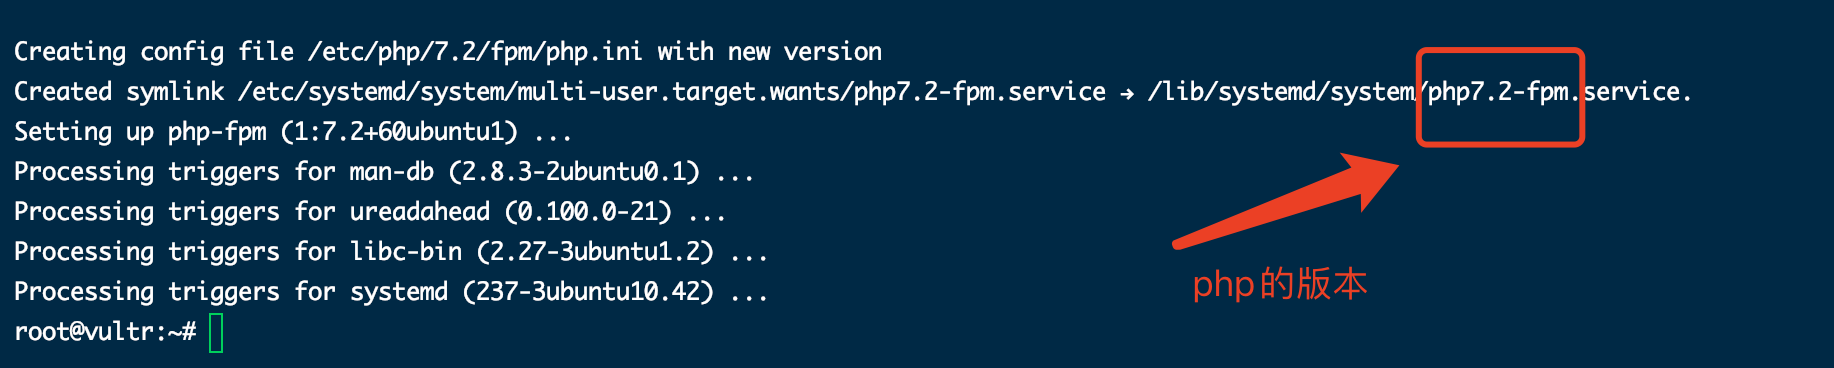
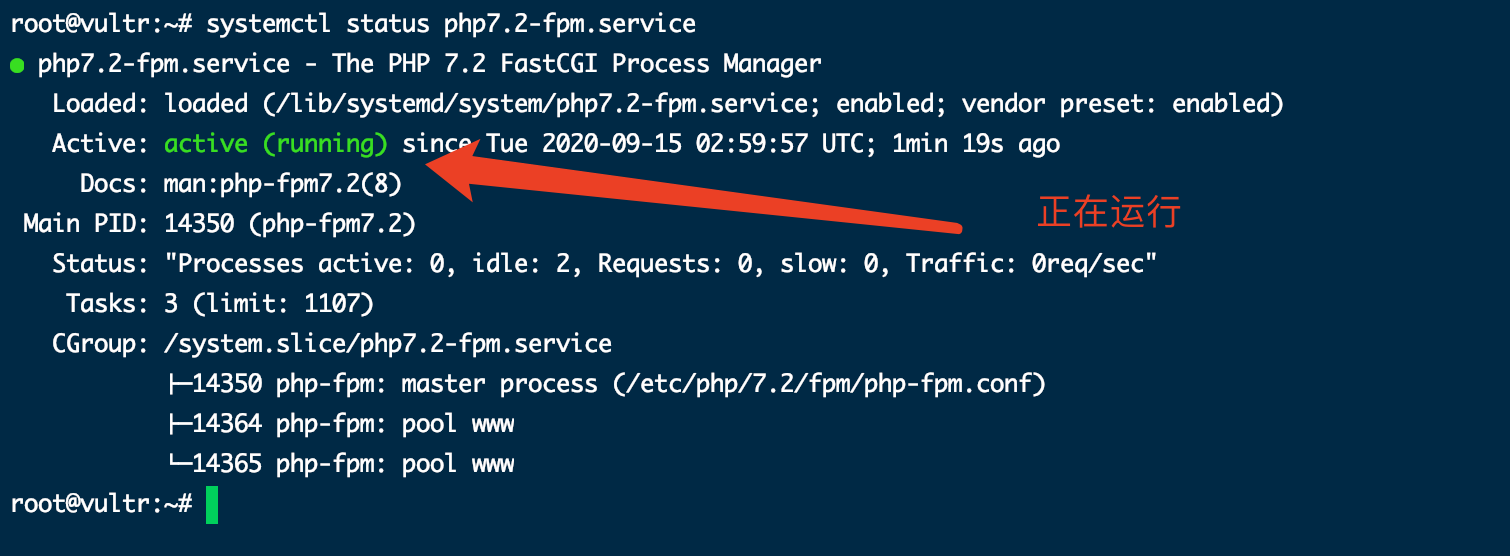
检查PHP FPM服务的状态
1
systemctl status php7.2-fpm # 这里 7.2 是php对应的版本
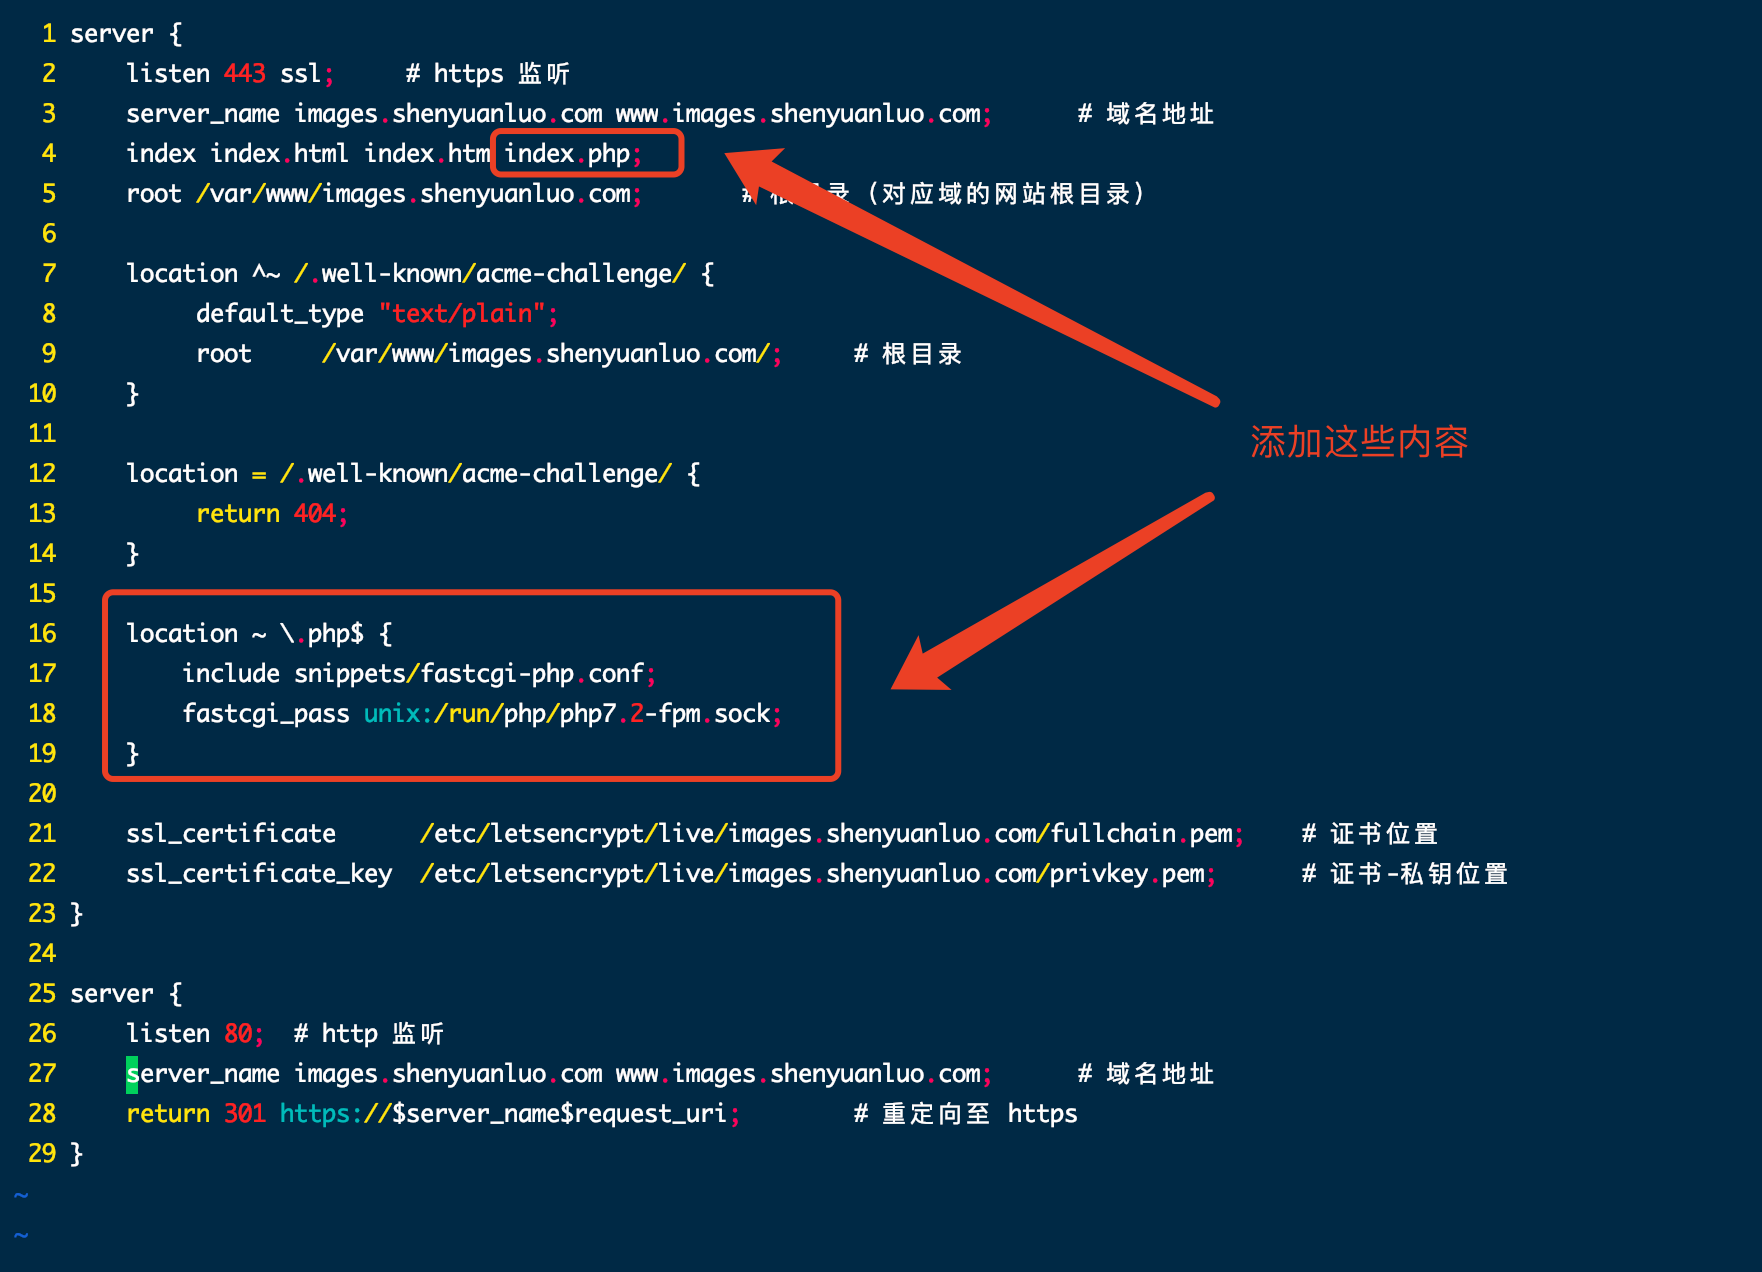
编辑对应的域服务配置文件
1
sudo vim /etc/nginx/sites-available/images.shenyuanluo.com
添加以下信息,以便Nginx可以处理PHP文件:
1
2
3
4
5
6
7
8...
index index.php;
...
location ~ \.php$ {
include snippets/fastcgi-php.conf;
fastcgi_pass unix:/run/php/php7.2-fpm.sock; # 注意这里PHP的版本号
}
...
测试 PHP 的处理
1
sudo vim /var/www/images.shenyuanluo.com/info.php
输入以下内容
1
2
3
phpinfo();保存文件,重启
Nginx服务1
sudo systemctl restart nginx
打开浏览器,然后访问
http://your_server_ip/info.php,如下图所示,则说明配置成功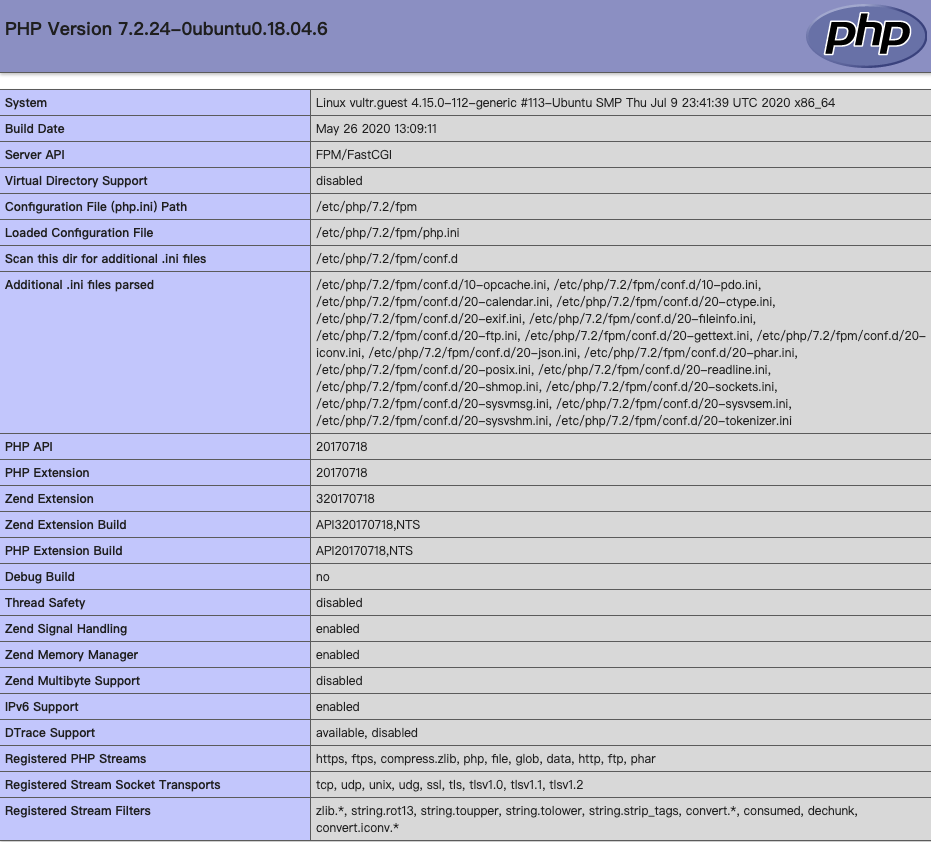
使用 phpMyAdmin 管理 MySQL
安装 phpMyAdmin
1
sudo apt-get install phpmyadmin php-mbstring php-gettext
选择 apache(按
Space,然后按Enter)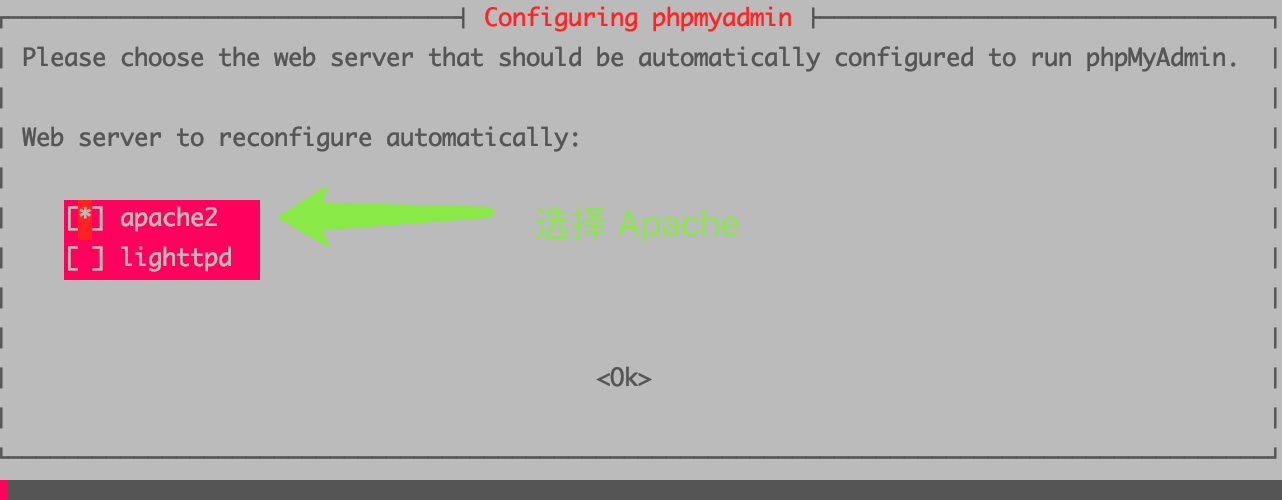
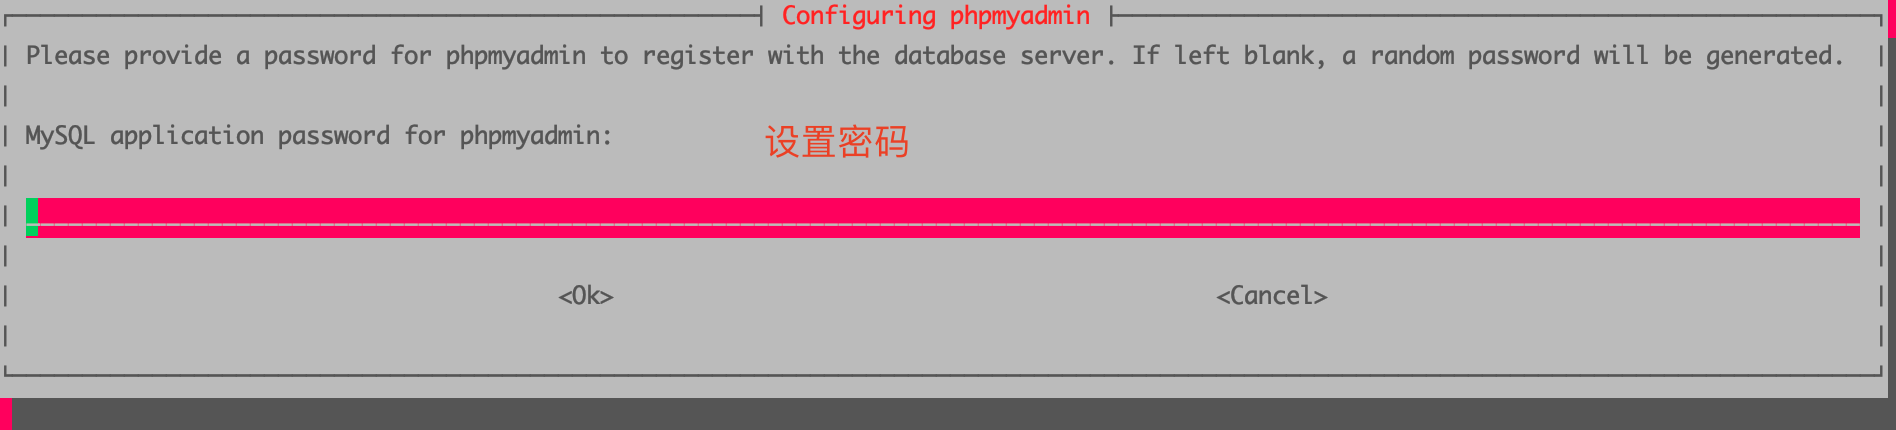
设置数据库,选择
Yes并点击Enter
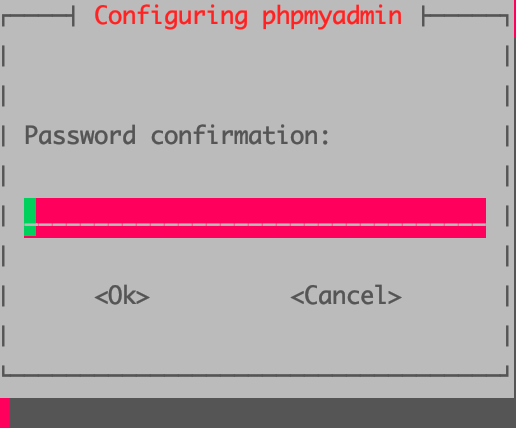
最后设置密码,并确认密码,即可完成安装
安装完成后,创建链接
1
ln -s /usr/share/phpmyadmin/ /var/www/images.shenyuanluo.com/ # 指向对应域的根目录
重启 Nginx
1
systemctl restart nginx
访问**
http://server_domain_or_IP/phpmyadmin**,出现下图则安装配置成功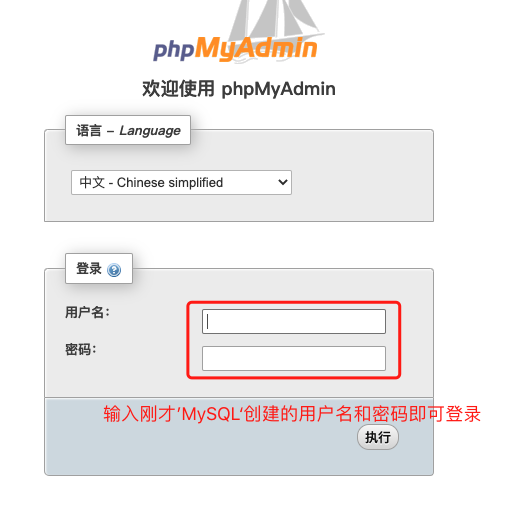
安装 chevereto
下载 https://chevereto.com/free 安装脚本
1
2
3cd /var/www/images.shenyuanluo.com # 进入图床域根目录
sudo rm ./index.html # 删除(之前用户测试域配置的)
sudo wget -O index.php -c https://chevereto.com/download/file/installer # 下载安装脚本,并命名为:index.php编辑对应的域服务配置文件
1
sudo vim /etc/nginx/sites-available/images.shenyuanluo.com
添加以下规则
1
2
3
4
5
6
7
8
9
10
11
12
13
14
15
16
17
18
19
20
21
22
23
24
25
26
27# Chevereto NGINX generated rules for https://images.shenyuanluo.com/
# Context limits
client_max_body_size 20M;
# Disable access to sensitive files
location ~* /(app|content|lib)/.*\.(po|php|lock|sql)$ {
deny all;
}
# Image not found replacement
location ~ \.(jpe?g|png|gif|webp)$ {
log_not_found off;
error_page 404 /content/images/system/default/404.gif;
}
# CORS header (avoids font rendering issues)
location ~* /.*\.(ttf|ttc|otf|eot|woff|woff2|font.css|css|js)$ {
add_header Access-Control-Allow-Origin "*";
}
# Pretty URLs
location / {
index index.php;
try_files $uri $uri/ /index.php$is_args$query_string;
}
# END Chevereto NGINX rules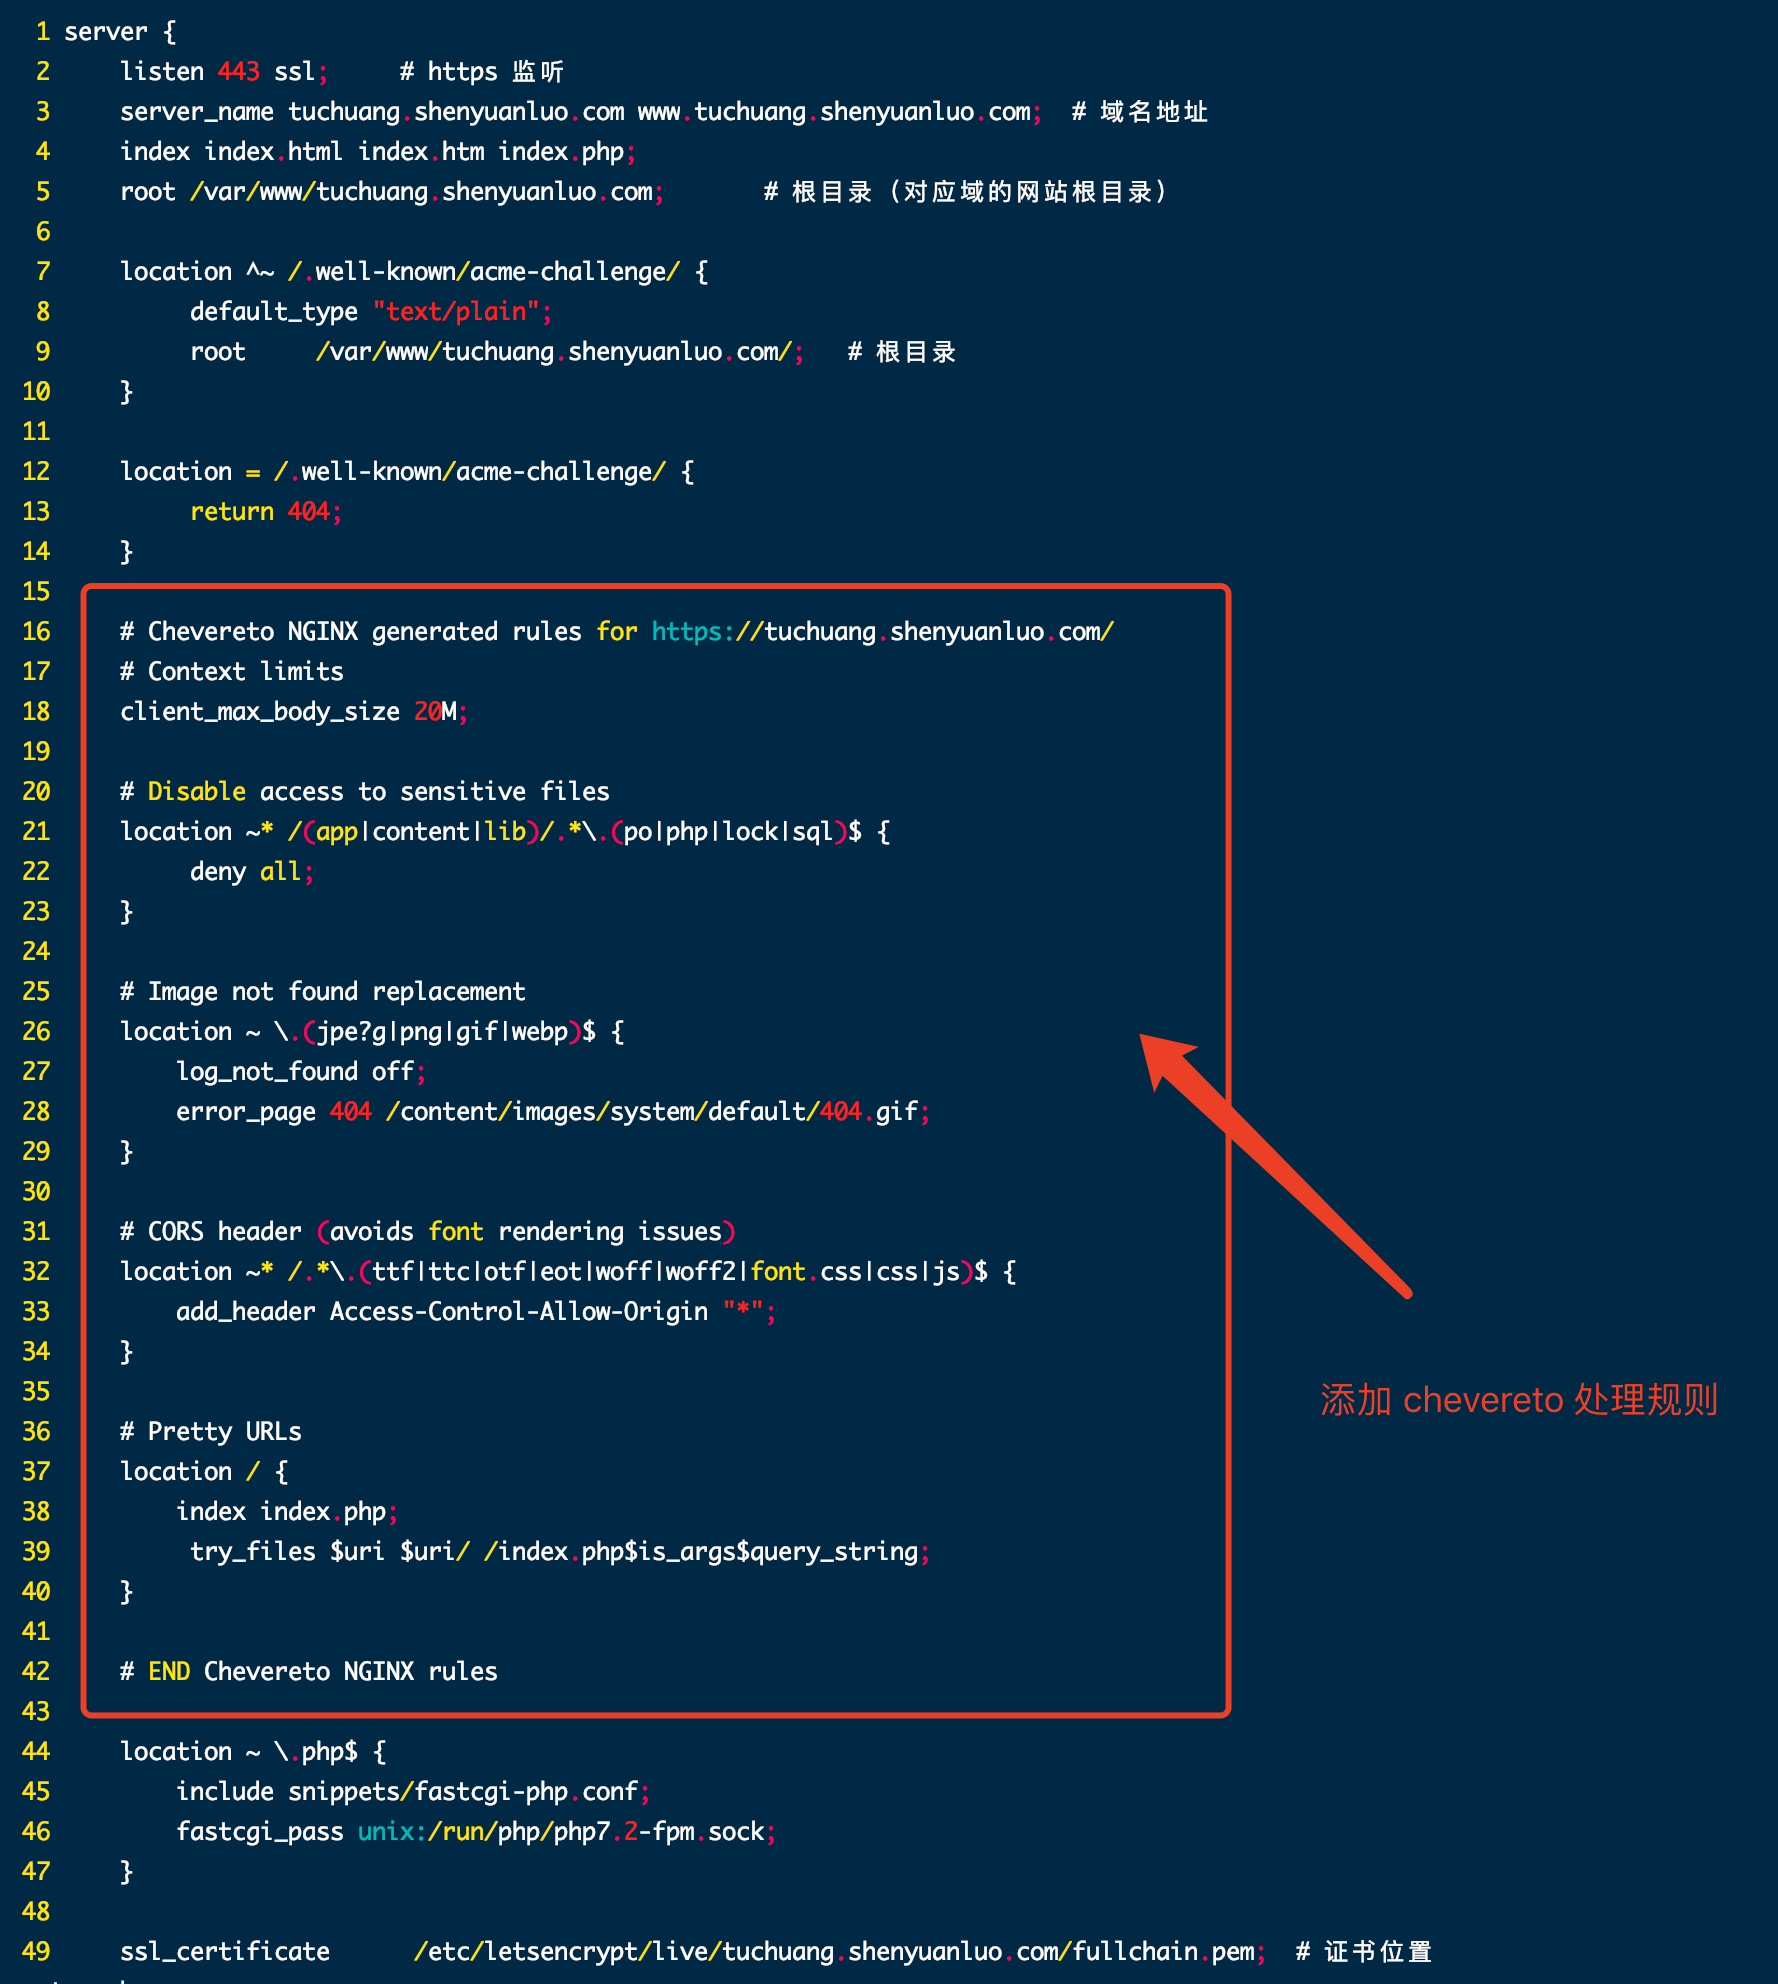
重启 Nginx :
1
sudo systemctl restart nginx
访问**
http://server_domain_or_IP**,出现下图,则说明安装成功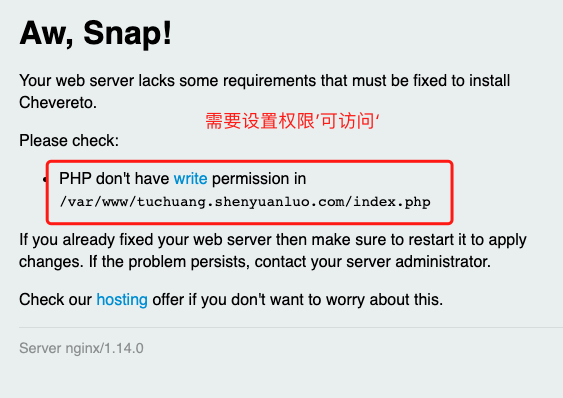
修改
index.php权限1
sudo chmod 777 -R /var/www/images.shenyuanluo.com
访问**
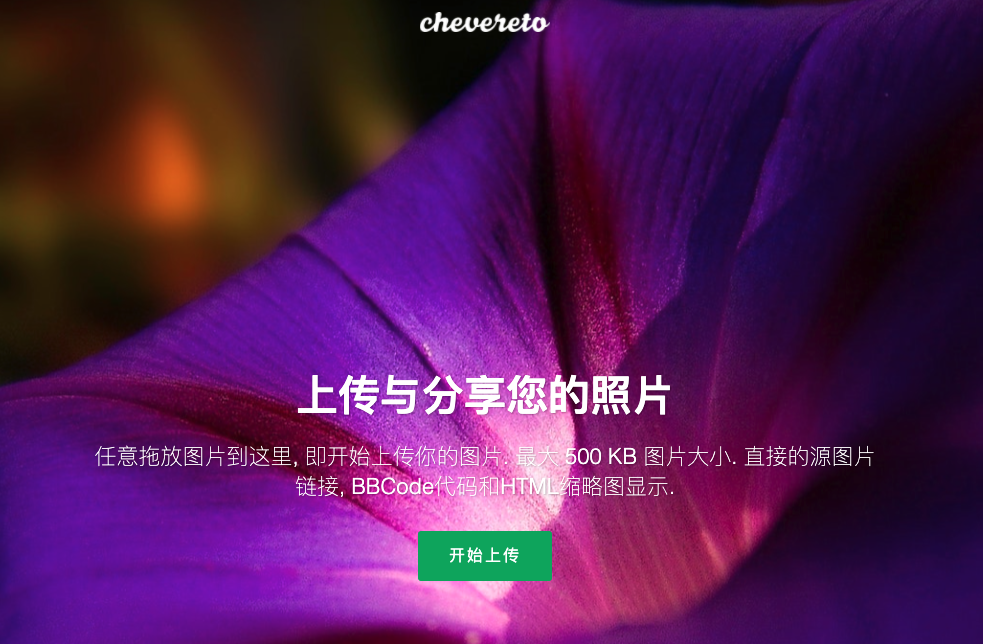
http://server_domain_or_IP**,出现下图所示,则说明完成配置,安装引导设置即可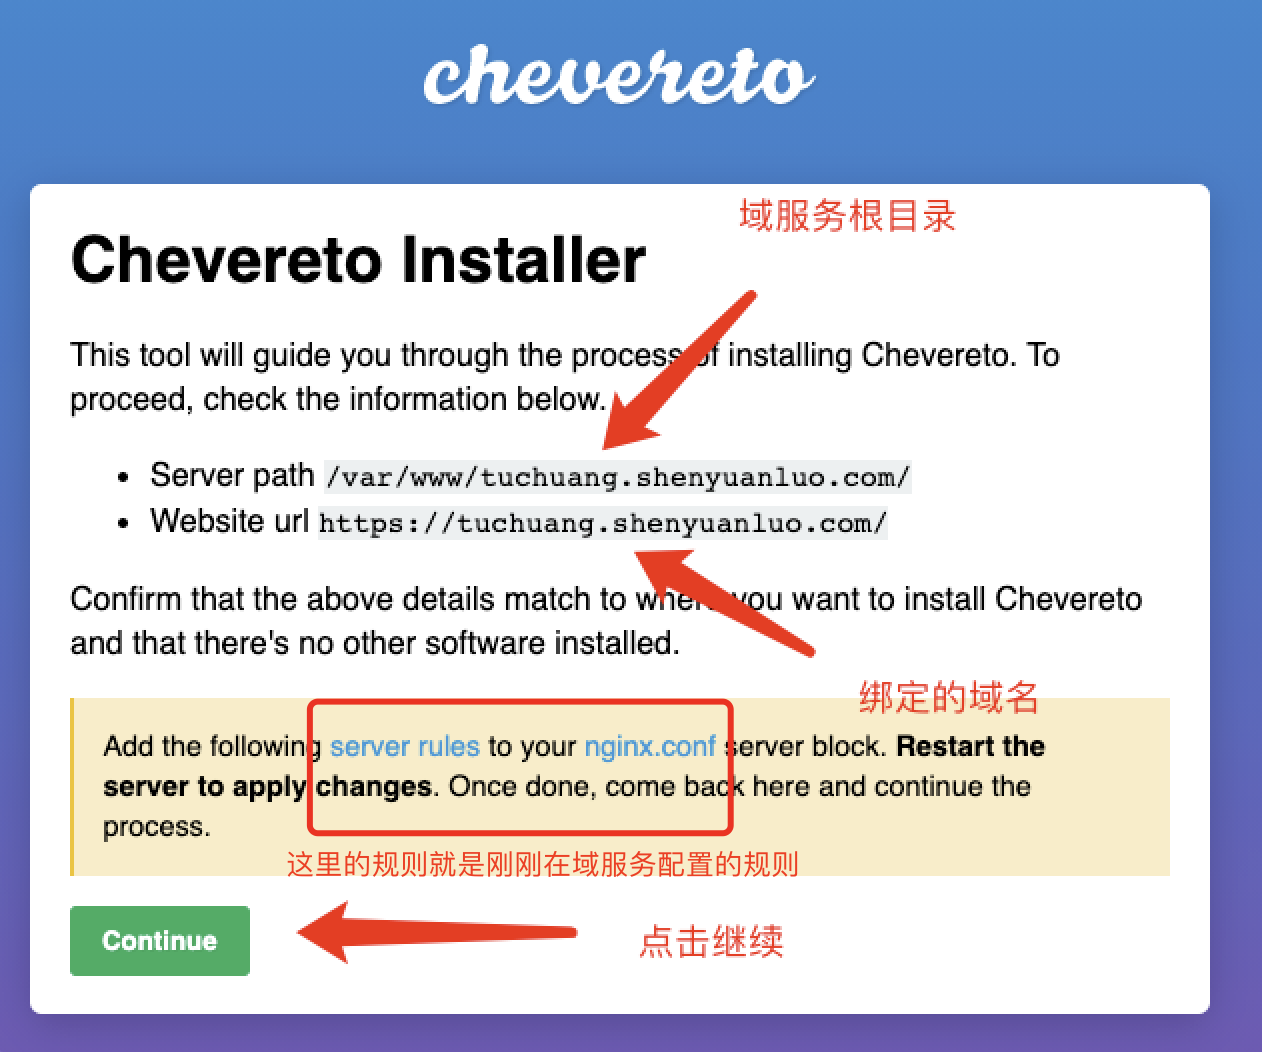
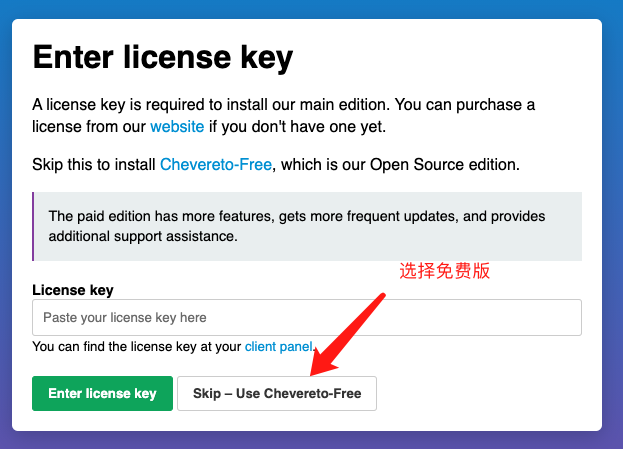
选择‘免费’版本
跳过
cPancel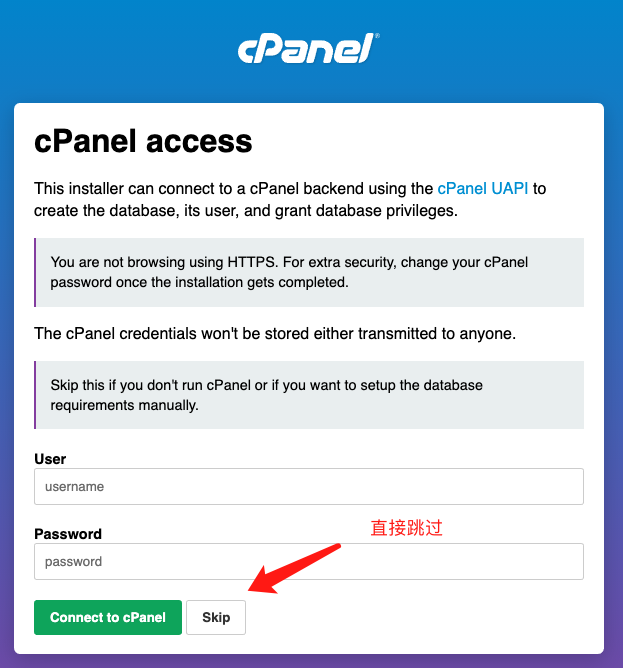
设置数据库相关信息
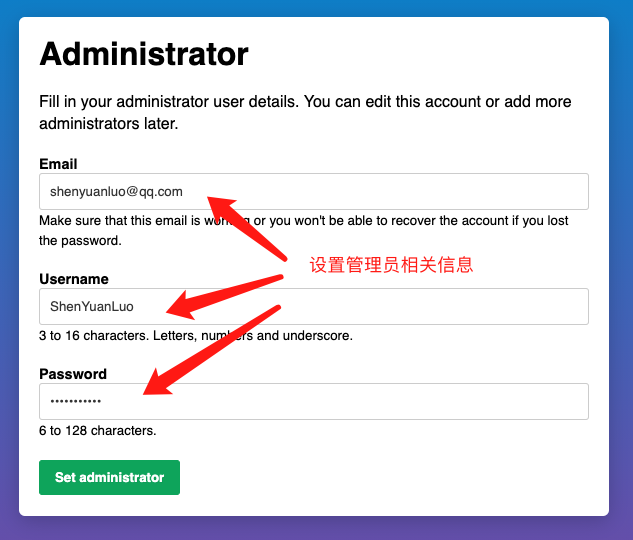
设置图床(Chevereto)管理员信息
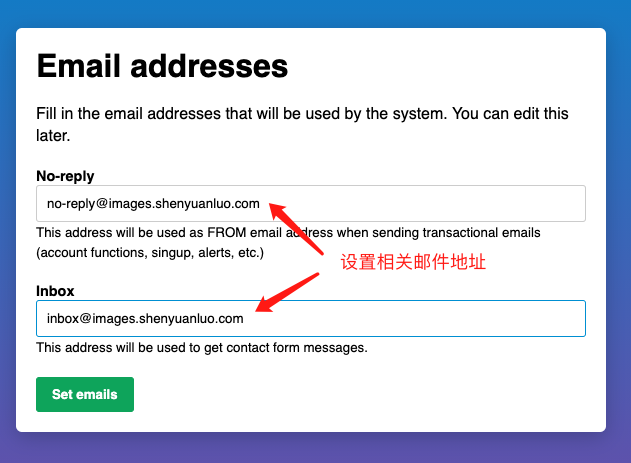
设置图床相关邮件地址信息
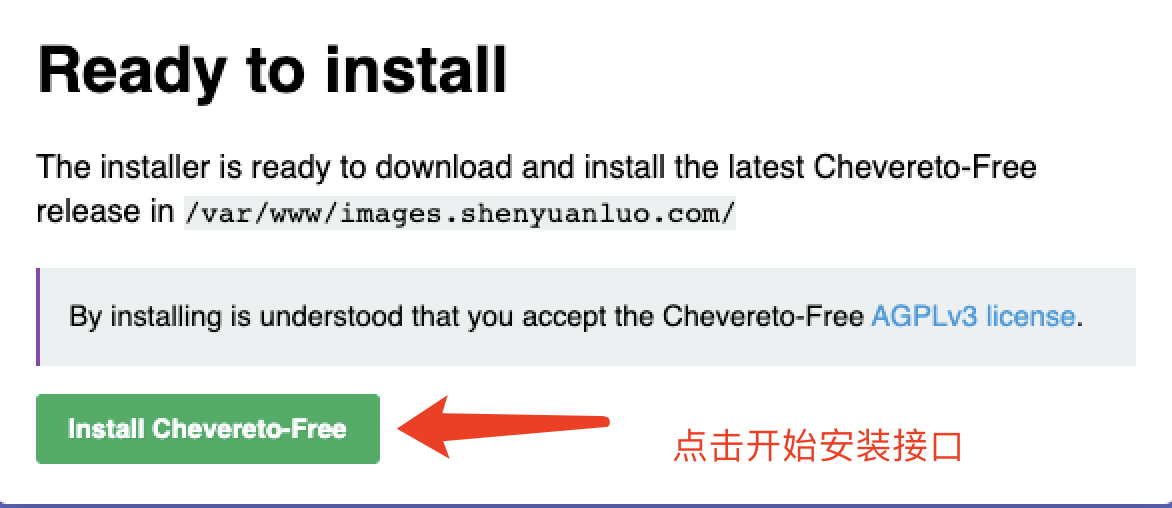
最后点击‘开始安装’即可
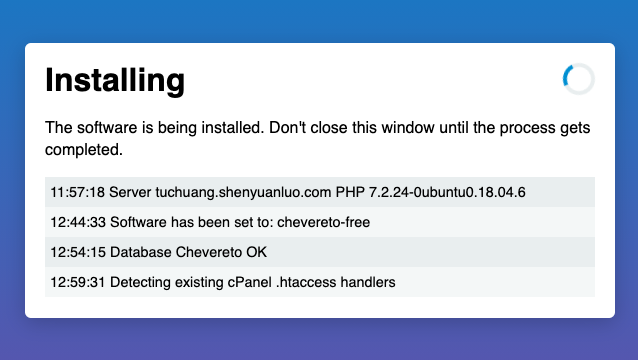
耐心等待,即可完成完成
安装完成后,访问**
http://server_domain_or_IP**,如下图所示,说明已经成功搭建Chevereto